Showing posts with label urban gardening. Show all posts

Urban Garden Update: Orange

Lettuce, I love you and I want to eat you but you look way too pretty to cut down just yet.


I guess I am waiting to see just how big this bunch can get!

We have colour! (other then green of course) One of our tomatoes is turning orange, it's very exciting.

Just 67 more colour changes to go! That's right, at last count, we had 67 tomatoes growing.
Eek! It's salsa time soon.

Our strawberry plant is spreading like wild fire, I love it! No strawberries since the last couple that grew but I see many, many strawberries in the future.

Kale Cupid - I have paired and re-potted my kale plants.  Grow my pretties, grow!

Urban Garden Update: Lettuce and Strawberry

We have colour! Our cute little strawberry finally turned red and his has a friend.

 And we have tomatoes! Very small yet but still very exciting for us.


Potato flowers, moments before we dug up the plants to look for potatoes.


Our wee little lettuce sprouts are growing up ...


And to think just weeks ago they looked like this: Week 3


 Our wildly growing mint plant; already had to cut it down once.

 Harvesting our VERY small, sad potatoes.  At least we gave it a shot!


 It wasn't a complete loss, we got one nice potato and one baby potato out of it.

Looking forward to moving the garden to their new beautiful home ... soon.

I'm in Love! ... with my Garden

Edible flowers - Pansies
 I absolutely am completely in love with my garden and here's why ...

 Lettuce is amazingly resilient 

 Cabbage is stunningly beautiful.

 My lettuce garden is almost too beautiful to eat but I imagine it will taste delicious nonetheless!

 I have more kale then I will know what to do with (not showing, about 5 more kale plants)

 You can grow potatoes pretty much anywhere, even in a bag on a balcony, it will grow...

 and it will be beautiful.
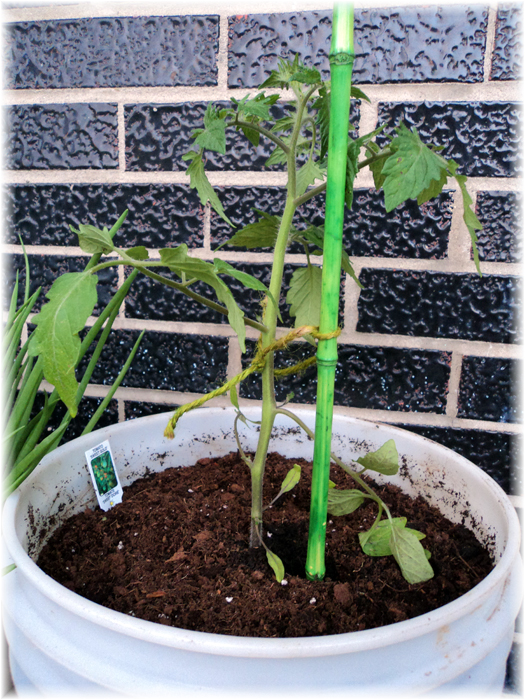
 Tomatoes grow wickedly tall!


My first strawberry.
 
And finally, my lovely herbs! Just hanging around.

DIY Gardening: Planting a Lettuce Family


Step One: Purchase a wicked, Eco-friendly and recyclable, 18 inch (depth) container to do your planting in. Then get your Tim the Toolman grove on and drill some holes into the bottom of it (for your water drainage system to work).


Step Two: Fill the bottom of your tub with rocks, preferably pebble like rocks which can be purchased at any garden centre or if you are really, really bored and have the time, hit a gravel or rocky road and start collecting!


Step Three: This is an optional step but it was suggested by my father, and I think it's a great idea, to add a layer of crumpled newspaper. The newspaper will help absorb excess water.  And this newspaper gets extra bonus cool points since it comes from the remains of an old NOW magazine paper.


Step Four: This option is NOT optional seeing as earth is necessary for plants to grow in.  What is optional is your choice of dirt.  In this case I am using a combination of peat moss (light, fluffy and dusty dirt) with organic potting soil (dark and moist).


Step Five: Start adding your pretty little lettuce plants to the pot.  I planted four in total plus a couple of strawberry plants which I learned grow well next to lettuce ... unless of course the Internet lied to me.


Step Six: Proudly display your new lettuce Greens/strawberry garden and take of picture of it. Oh, and it's a good idea to water your plants at this point it just at wee bit.

Lettuce and strawberries do need a sufficient amount of water, especially during the early stages of growth but be sure not to over water your plants.  Your new water drainage system will help!

holes + rocks + paper = Happy Plants

Balcony Garden Week 7: An Update Gallery


The garden to date, organized, green and growing beautifully.  Here I have placed my lettuce plants on a shelf, the pea plants on the top and right next to it the tomato and mint.  It's amazing how quickly everything is growing and if not watered properly how quickly the plants change - example, from green and lush to limp and yellow.  It's an interesting learning experience so far ...


On this shelf, clockwise from top to bottom: Lemon balm, broccoli (soon to be transferred), cabbage, broccoli, and strawberry.

As I experience and read from my many, many gardening books I am learning a lot along the way. For instance, the broccoli plants will be need to be transferred to deeper pots to be eventually "earthed up" because the crown will get very heavy as it matures.


My lovely little tomato tree - well, not so little already - this sucker grows fast!


And who said you  can't grow potatoes on a balcony in a container (in this case mesh bag) - ha! We'll see what comes of this but so far the potato plant is going strong, I love it!


Close up shot of one of my cabbage plants ... can't wait to see this one flourish!


Pretty peas all in a row.  I will eventually (soon) have to add a string running horizontally across the plants to help them grow upright.  These guys like to latch onto their supports as they grow.


And the newest addition to the garden: Lavender Lady

Know any great gardening tips?
I'd love to hear them, please share!

New Additions to the Garden Family


As an anniversary gift Mike bought me garden flowers. I picked out these greens plus the pansies because they are edible flowers! They can be used in baking or in salads, plus they're very pretty and add some colour to our garden.

Our sweet onions weren't doing so well, in fact most of them were drying out.  The lesson here: create a good water drainage system in your containers.  Very important! Instead (courtesy of my father) we have these green onion beauties ready to cut and ready to eat whenever we please.

Also from my dad (the best farmer/gardener I know), a tomato tree, a 'sweet golden' tomato tree to be exact.


In your garden containers it is so important to help prevent roots from drowning and your plants from dying.  The best way to avoid this is to:

Create a good water drainage system

1. Add a base layer of rocks (similar to a pile of gravel rocks) on the bottom of your container, which should also already contain holes on the bottom for excess water to escape out of.

2. Then some people will add a layer of newspaper on top of the rocks  Since our containers are a bit small I didn't do this step.

The second very important lesson I learned:  

Mix your potting soil

The reason: it helps prevent your soil from being too heavy and weighing down your young plants and their roots, especially during the early growing stages.


For my plants I used a combination of thick organic garden soil and peat moss mix.  Of course always remember to ensure there are water drainage holes on the bottom of your containers.

The final step will be mulching, which in my case is too early yet to start.  Adding mulch to your garden containers will help to keep your soil moist and cool and from drying out.

Balcony Garden Week 3: Progress and Snow Peas

Another weekend, another market visit but first let's review the progress.  A couple of weeks ago we planted a few things including, strawberries, sweet onion, herbs, and lettuce and kale seeds.  Both the lettuce and kale seeds have sprouted quite quickly and nicely.

Pea sprouts from the Evergreen Brickworks Farmer's Market - planted just about five days before this picture was taken.

My precious kale sprouts.  I can't wait to devour these beauties, in like months from now but nonetheless they will be fantastic.

Today it was rainy, foggy and wet, so we decided to walk to the market with our dog taking our time and enjoying all the green growing around us.  I love visiting the market every weekend to experience the natural changes.  First stop, breakfast!

Mike and I often stop off at the Waffle Bar first simply because the splendid aroma just draws us in.  Granted, their waffles are not vegan but I sometimes just can't resist - it's a treat for me and for Mike, it's breakfast.

Next step, the Garden Centre and my favourite part of the day, getting to choose all the lovely new plants to take home and re-pot.

As I continue making my way through the market, Mike takes a break to hang with Scarlet at the official dog hang out.  Unfortunately, dogs are not allowed inside the market until the end of the month when it moves outdoors.

One of my favourite plants we bought today - snow peas! Now I'm not sure just how these are going to turn out but I truly look forward to the outcome.  The containers that the plants come in are very easy to break apart which makes re-planting easier, so that you can gently take the plant out without crushing or damaging it.

Snow peas, eight of them in a row.

The new additions to our garden today: Yes, more lettuce and greens but these are premature plants that will be harvested earlier then our sprouts.  Also, lemon balm, chamomile, broccoli, cabbage, and snow peas.

I think that will be it for our balcony garden, at least for a while, especially seeing as these plants have pretty much taken over our kitchen table, chairs and surrounding floor.  Looking forward to warmer weather soon please!

Balcony Garden Week 2: Strawberries

One of my all-time favourite Summer activities is to visit our local Farmer's Market.  In my case that would be Toronto's Brickworks Farmer's Market and with each weekend visit I fall more and more in love with it.  I love the scenery, being outdoors among nature at 7am, visiting the friendly vendors, and sensing that true feeling of what it means to be in a community.

Last week Mike and I started our balcony garden, a.k.a. urban garden, planting lettuce, kale and field greens seeds in long trays.  We also bought a mint, basil, spinach, and green onion plant.  As first time city gardeners we were ecstatic to see first signs lettuce and kale sprouts - I believe I literally screamed with excitement!

As we were even more excited to see how far we can go with our balcony garden, we decided to make another weekend visit to Brickworks (which will likely turn into a weekly event for the summer) and see what else we can plant.

The Brickworks market has really come a long way since I've started visiting just over two years ago, which is not that long really, but they expanded a lot, built an entire indoor market next to their summer outdoor market.  They also have some of the best organic and locally grown produce and plants to choose from.

From what I've seen in past years they have also expanded to include more locally made and prepared packaged foods, sauces, creams, drinks, etc. and crafts and books about gardening, particularly city gardening.

On today's agenda: Strawberries! Here I'm trying to pick out the best ones, at least in my opinion.

After riding through the muddy Moore Ravine (for the second time) to get home, with muddy pants and tired feet I was determined to get re-potting ... and I did!

Our strawberry plant's new home.

Our balcony garden: A work in progress.  We also re-potted chives and rosemary and planted pea sprouts today.  Can't wait to see what week three will bring!

Starting your own balcony garden can be fun and perhaps easier than you might think. It's a healthy challenge that can really teach us to appreciate our food especially when we see the amount of time and work goes into growing it!


Besides receiving some wonderful tips from Aaron at the market's Organic Garden Centre, I also did some research online and found some great books to help us get started, such as Susan Berry's Kitchen Harvest: A Cook's Guide to Growing Organic Fruit, Vegetables and Herbs in Containers.

Are you growing an urban garden?
Know any great tips or tricks you'd love to share? 

I would love to hear them, please leave a comment :)